See SJ, my luck is holding

First off, whoever put it together really shouldn't be in the business, (sorry if it was you).
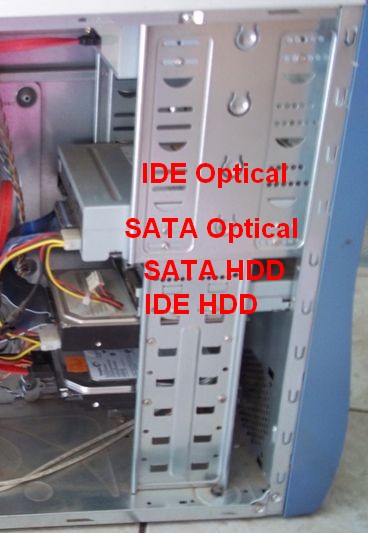
OK, I don't know how deep you want to go here but if it was me and working with what I have in the case, I'd do the following:
1) Remove the IDE & SATA optical drives;
2) Remove the IDE & SATA HDDs;
3) Remove the floppy drive.
Then replace them in the following positions:

Given the length of the power connections this positioning should allow for all drives to be powered, (the floppy is discarded).
Otherwise we have two alternatives, both of which require some fiddling.
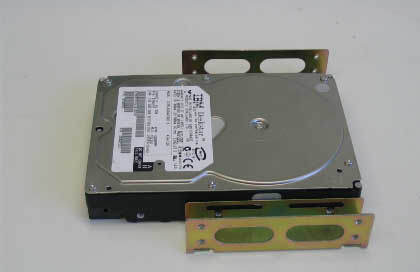
Option 1: Obtain a set of 3.5 to 5.25 adapter mountings and move the SATA HDD to just below the SATA optical, this would allow the SATA optical to be powered also.
This is a pair mounted on a HDD, then you just screw the HDD into a 5.25" slot.

Doing this means you could disconnect the whole IDE bus because you'd still have the SATA optical drive to install Windows with.
Heck, tell me your address and I'll post you a pair
 Option 2:
 We fix the IDE Master/Slave fiasco - the easiest but you still end up with a non-functioning SATA optical.
The problem with the IDE bus is that the HDD is the designated Master device, however it's in the wrong position on the cable to be the Master, (the Master is supposed to be on the end of the cable).
However, the Maxtor is actually in the correct position on the cable for what we want to do, ie. remove it from the system during install.
What you need to do is re-jumper the Maxtor and the IDE optical so that they get swapped around, ie. the optical becomes the Master and the Maxtor the Slave.
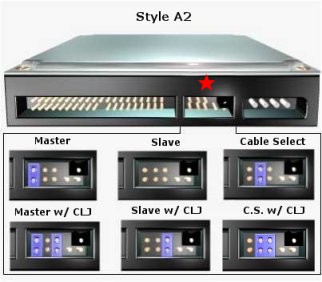
On the back of the Maxtor there is a small jumper block something like this, (red star over it):
 NOTE:
NOTE: The jumper block might not look exactly like this since they changed the style a few times, you'll need to tell me the exact model number so I can find a diagram.
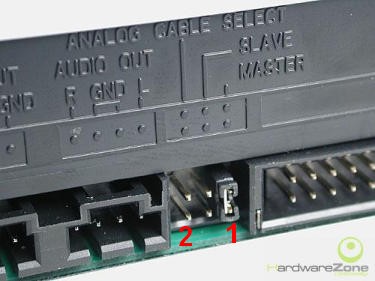
The back of the optical drive will look like this, (thankfully they're pretty standard):

What needs to be done for both the Maxtor and the optical is to move the jumper from whatever position it is currently in to the position marked CABLE SELECT, (or CS, CSEL).
On the optical picture I've marked it as the number
2, the jumper is the little thing marked
1.
This is normally a pretty easy thing to do, a bit fiddly when the drives are installed but certainly doable with a bit of patience and some needle nose pliers - the most fiddly will be the optical drive since the jumper block is on the other side of the IDE cable, (when viewed from the photo perspective). A good light and a magnifying glass might also be of benefit or a really friendly neighbour with good eyesight and a steady hand.
Don't forget, disconnect the power.
