One of the most common things people do with screenshots is add arrows, labels, and annotations. This tutorial will walk you through a simple example and show you how to use the object editing tools.
Take a screenshot as normal and select it.
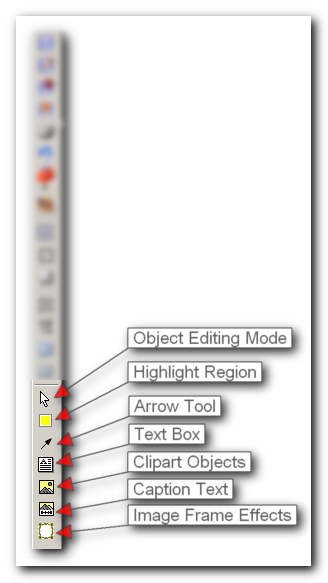
The object editing tools are located at the bottom of the right-hand toolbar:
To add an arrow or text box or highlight region, just click on that tool, and draw the object on top of the screenshot.
A new panel will pop up when you select an object tool, allowing you to customize the parameters of the object and fill in any appropriate values:
![]()
Notice that the arrow tool button is pushed down, and the white cursor now has a red O on top of it - this let's you know you are in object mode.
If you ever want to adjust the position or parameters of an object, toggle the top white arrow to switch in an and of object editing mode.
When in object editing mode you can select and move objects.
When you draw an object, you can automatically have text displayed at the arrow's end - just fill it in the "Endpoint Text" edit box.
All objects have a transparency setting that let's you specify how much transparency the object has.
By default, after you add one object or text box, you will switch into object editing mode. If you want to draw many arrows at once you can find options for this in the preferences dialog.