Screenshot Captor can be configured to work in several very different ways. You will get the best results if you take the time to configure Screenshot Captor to match your workflow.
| • | If you're taking a lot of screenshots to use later -- you can configure Screenshot Captor to stay completely out of your way in the system tray letting you capture image after image using a keyboard hotkey without interrupting you or taking up space on your screen. When you're ready you can bring the program up and manipulate, copy, prune, rename, etc. |
| • | If you prefer a more interactive approach, you can configure Screenshot Captor to show you a concise "Post-capture" dialog after every capture, which prompts you for each new capture to save, reject, print, email, upload, etc. |
| • | If you're the more visual type -- you can have Screenshot Captor display a small (autohiding) dock at the top of your screen providing quick access to all capture methods and options; you can configure this bar to match your approach. |
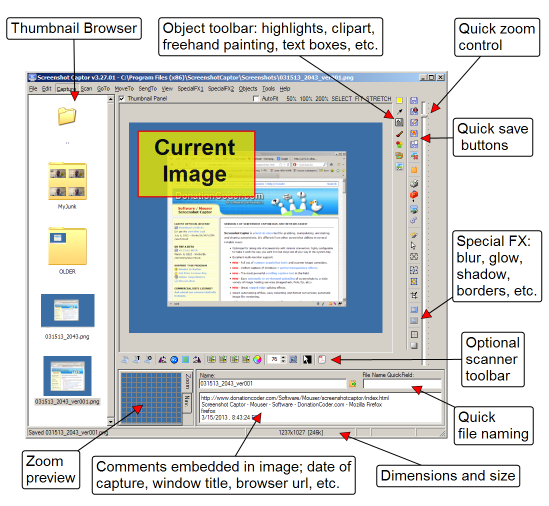
Opening the main window let's you quickly browse through large numbers of screenshots -- you can manipulate these in ways you are already accustomed to because the thumbnail panel acts just like the standard Windows Explorer -- you can drag and drop and right click on files just like you can in your normal file manager.