Clipboard Help+Spell has a powerful text modification dialog.
You can trigger this dialog from the main window or the quick-paste popup menu:
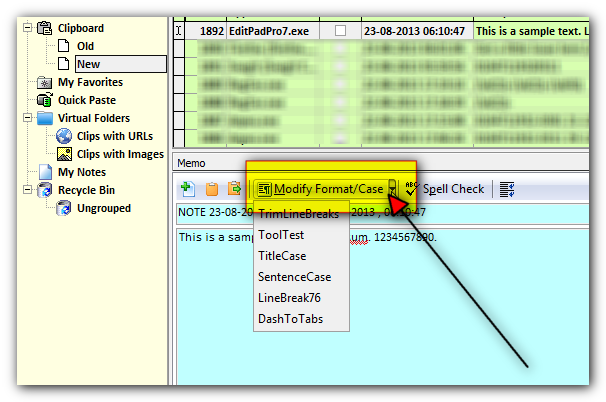
On the main window, pressing the Modify Format/Case button itself will launch the interactive dialog described below. You can also press the drop-down arrow to quickly apply one of your saved presets. Similar options can be found in the quick-paste popup menu.
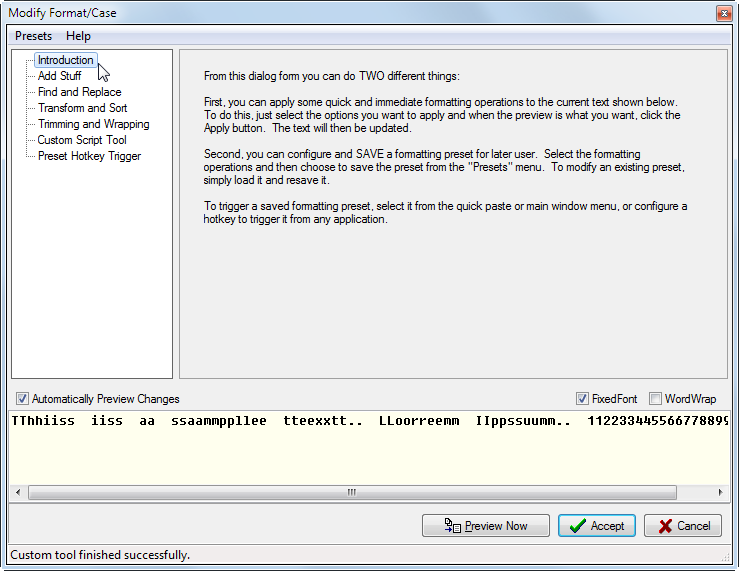
The Modify Format/Case dialog itself is broken up into several sections, but keep in mind that the effects of ALL sections are applied to the text being operated on. You can enable or disable sections by clicking on them in the left hand tree and using the checkbox to enable/disable.
The preview of the modified text is shown at the bottom. By default the "Automatically Preview Changes" option is set so that you will immediately see a preview of the changes but you could disable that if you have a huge amount of text and it's too slow (in this case use the Preview Now button instead).
To help you visualize the changes you can change the preview options to word wrap or use a fixed font.
To accept the changes and modify the actual stored clip, hit the Accept button. Hitting Cancel will leave the clip unchanged.
IMPORTANT: One of the most useful features is the ability to SAVE and LOAD your configurations here from the "Presets" menu of this dialog. With this ability you can quickly re-apply a series of modifications to a clip, either from the main window, pop-up menu, or even with a hotkey. This is a somewhat advanced feature described below.
Now let's take a look at some of the other ways to use the Modify Format/Case dialog.
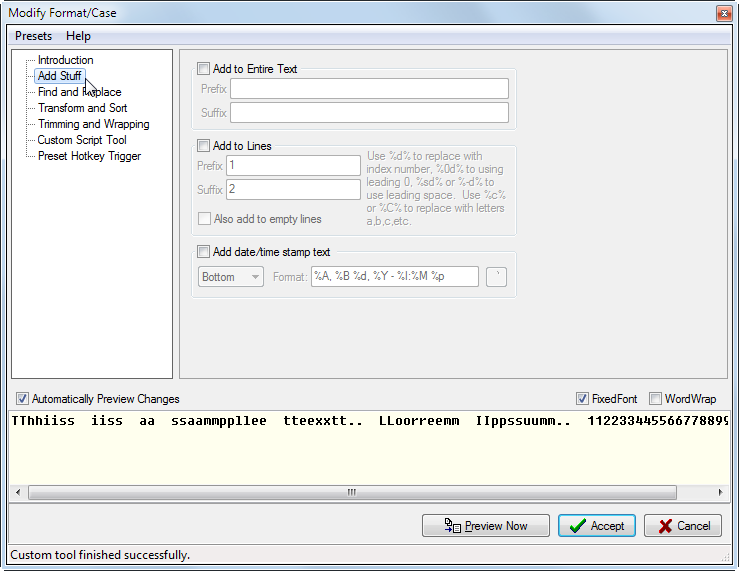
One common thing you will want to do is add some text to the beginning and end of the entire cliptext or to each line in it. You can also use this section to add line numbers or a timestamp:
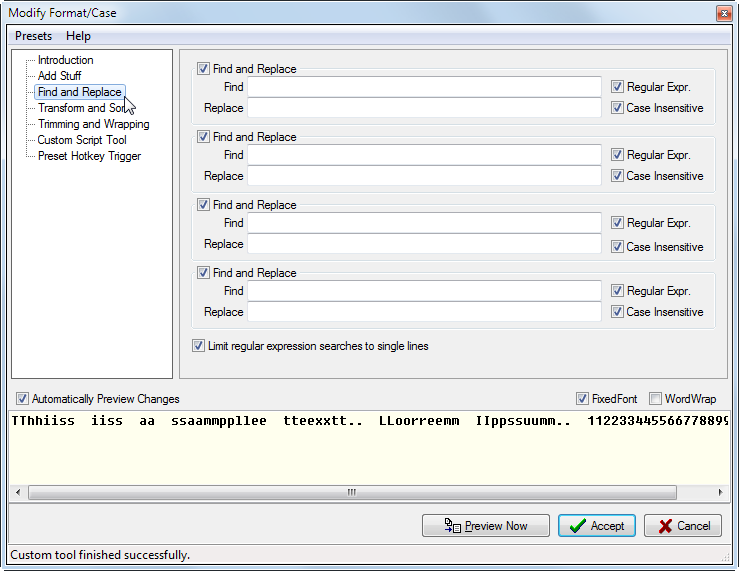
Note: When adding,replacing, or searching for text you can use the following special characters:
\n newline
\t tab
Another common operation you may need to do is perform some search and replace actions. The section has multiple slots so that you can more easily keep a few different common search+replace pairs. Regular expressions let you perform more complicated pattern searches (see the web for help on Regular Expression syntax). Uncheck an item to disable it.
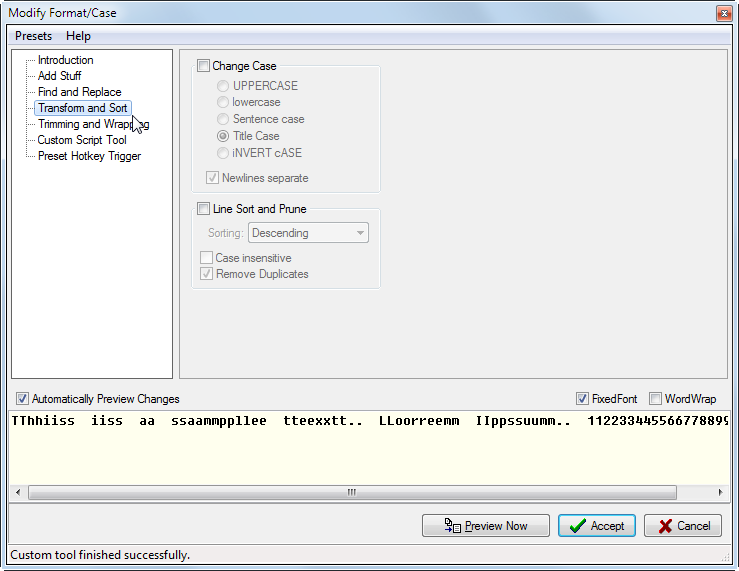
Modifying case is sometimes useful, from here you can also SORT lines and remove duplicates:
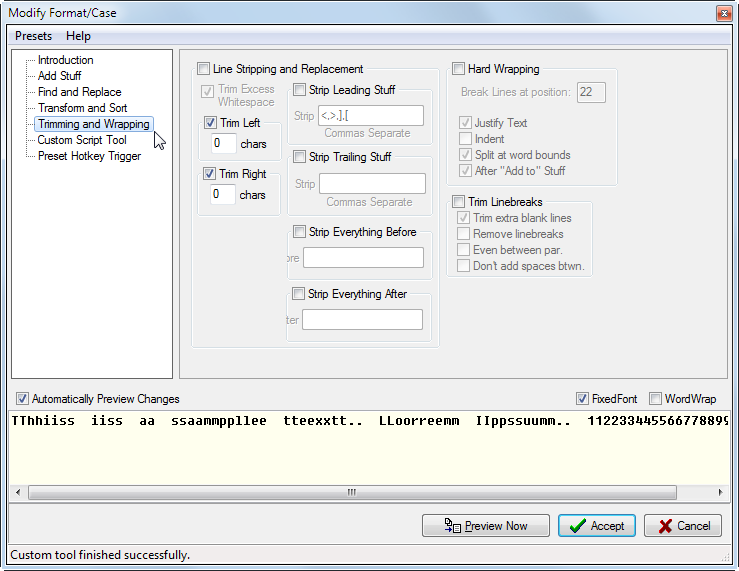
Trimming extra stuff in text is frequently useful. The options here can be a little daunting, but remember you have a live preview and you are free to experiment and see how each change affects the text without making any permanent changes to the clip. And remember, just uncheck an option to disable it and not apply it.
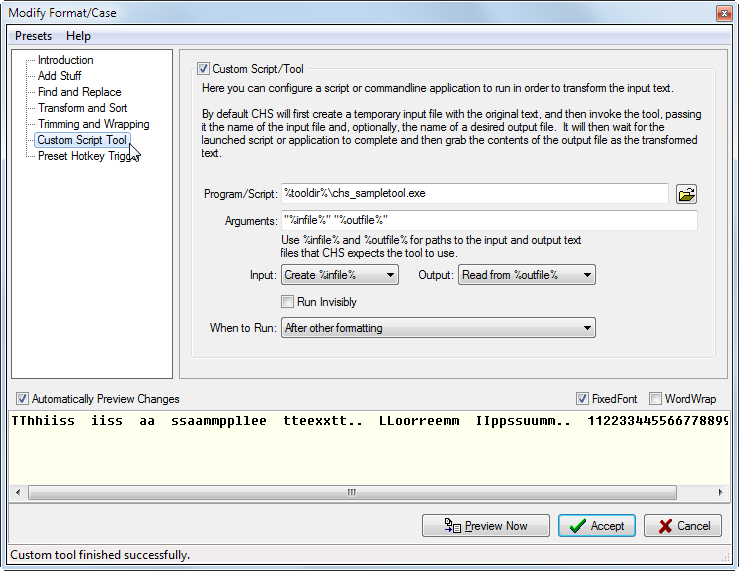
Really advanced users, with some scripting knowledge, can invoke their own custom programs/scripts to perform more advanced modification of text. You have some flexibility in how the text gets sent to your 3rd party script and how CHS reads the modified text, but the most common case is for CHS to write a temporary file with the original text, invoke the script, and then read back the modified text. A sample tool is included with CHS to demonstrate this feature. This feature is especially useful in conjunction with setting a custom hotkey to trigger a saved modification preset -- in this way you can use CHS to help you trigger your custom script with the simple press of a hotkey.
Saving and Triggering Presets, and using Hotkeys
You may find yourself wanting to re-apply a series of modifications to text often. For example, you may find that you frequently want to have a block of text word-wrapped at a certain length, or sort lines, etc.
To help you quickly do this, you can save, load, and apply formatting "Presets", which remember all settings in all of the sections of this dialog.
These presets are saves as separate files, and will appear in both the main window "Modify Format" menu, and in the quick-paste popup menu. To save or load a preset, use the "Presets" menu in this dialog.
Advanced Users: To delete a Preset you need to go to your file system where your CHS configuration is stored and delete the preset file from the Presets subdirectory.
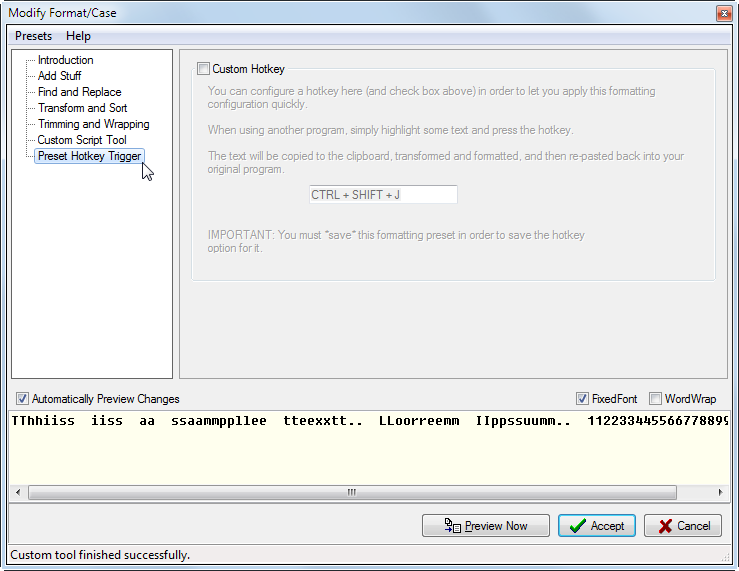
You can also set a custom hotkey that can be used from any program to apply the saved preset to selected text. To add a hotkey for a preset, set the hotkey in the Preset Hotkey Trigger section. IMPORTANT: You must re-save the preset after changing the custom hotkey option, or it will not be remembered.